Authentication
Kirby's internal user system is not only made for Panel users, it can also be used for parts of your website, which should be locked and only available to certain users (clients for example)
This tutorial will guide you through the necessary steps to build a login form and a logout as well as protecting certain templates from unauthenticated users.
Note that pages with content that should only be visible to authenticated users, should never be cached, otherwise it will be accessible to any site visitor.
User management
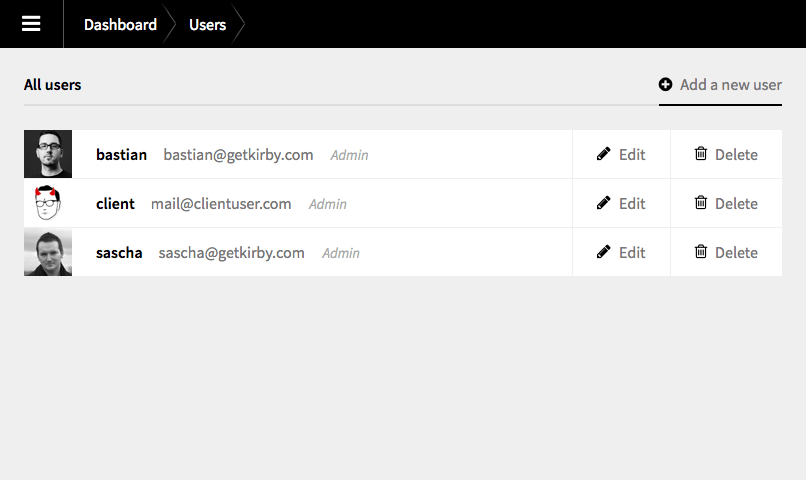
All users, including frontend users are managed via the Panel.
Creating roles without Panel access
By default Kirby has two roles: An admin role and an editor role. Both roles have access to the Panel. Frontend authentication is mostly used for separate types of users, which should probably not have access to the Panel at all. Kirby has a built-in way to create new roles without Panel access.
In your /site/config/config.php add the following list of roles, which will afterwards be available in the Panel when selecting a role for a new user.
c::set('roles', array(
  array(
    'id'      => 'admin',
    'name'    => 'Admin',
    'default' => true,
    'panel'   => true
  ),
  array(
    'id'      => 'editor',
    'name'    => 'Editor',
    'panel'   => true
  ),
  array(
    'id'      => 'client',
    'name'    => 'Client',
    'panel'   => false
  )
));
If you now add a new user in the Panel and assign the Client role, that user will not be able to login to the Panel, but login to the site only.
You can customize this even further with more roles, which can later be used to determine which parts of the site are accessible for which role.
The login
For the login page we are going to use an invisible page with some basic information and its own template. Create a /content/login folder and add a login.txt. We will use the text file to store all information needed for the form.
/content/login/login.txt
title: Login
----
alert: Invalid username or password
----
username: Username
----
password: Password
----
button: Login
By using those fields from the textfile it is very easy to translate the login form for multi-language sites. You can also just hardcode this stuff in your template of course.
/site/templates/login.php
The login template is pretty straight forward.
<?php snippet('header') ?>

<h1><?= $page->title()->html() ?></h1>

<?php if($error): ?>
<div class="alert"><?= $page->alert()->html() ?></div>
<?php endif ?>

<form method="post">
  <div>
    <label for="username"><?= $page->username()->html() ?></label>
    <input type="text" id="username" name="username">
  </div>
  <div>
    <label for="password"><?= $page->password()->html() ?></label>
    <input type="password" id="password" name="password">
  </div>
  <div>
    <input type="submit" name="login" value="<?= $page->button()->html() ?>">
  </div>
</form>

<?php snippet('footer') ?>
/site/controllers/login.php
To handle the form submission we are going to create a login controller to keep the logic out of the template.
<?php

return function($site, $pages, $page) {

  // don't show the login screen to already logged in users
  if($site->user()) go('/');

  // handle the form submission
  if(r::is('post') and get('login')) {

    // fetch the user by username and run the
    // login method with the password
    if($user = $site->user(get('username')) and $user->login(get('password'))) {
      // redirect to the homepage
      // if the login was successful
      go('/');
    } else {
      // make sure the alert is being
      // displayed in the template
      $error = true;
    }

  } else {
    // nothing has been submitted
    // nothing has gone wrong
    $error = false;
  }

  return array('error' => $error);

};
The login will redirect the user back to the homepage if it was successful. Otherwise the error variable is returned to the template as true and the alert is being displayed. If you want to redirect the user to a different page, just modify the path in the `go() method.
The logout
For the logout we don't need a real page. A simple URL to send logged in users to is enough. This is a perfect example for Kirby's new router.
/site/config/config.php
c::set('routes', array(
  array(
    'pattern' => 'logout',
    'action'  => function() {
      if($user = site()->user()) $user->logout();
      go('login');
    }
  )
));
By adding the code above to your config file, Kirby will register a new route to http://yoursite.com/logout When you open that URL, the action method will be called and if there's a logged in user, the user will be logged out. Afterwards the script will redirect the user to the login page.
Adding a logout link to the menu
As soon as the user is logged in it might be nice to display a logout link in the menu or somewhere else on the page. Here's a typical example of the code for a main menu in Kirby with an added li element when the user is logged in.
<nav class="menu">
  <ul>
    <?php foreach($pages->visible() as $p): ?>
    <li>
      <a <?php e($p->isOpen(), ' class="active"') ?> href="<?= $p->url() ?>"><?= $p->title()->html() ?></a>
    </li>
    <?php endforeach ?>

    <?php if($user = $site->user()): ?>
    <li>
      <a href="<?= url('logout') ?>">Logout</a>
    </li>
    <?php endif ?>
  </ul>
</nav>
Protecting Content
Once the login and logout process is covered, the rest is really easy:
Protecting entire pages
Entire pages can be protected from unauthenticated users by simply adding the following line to the top of a template:
<?php if(!$site->user()) go('/') ?>

// rest of the template
This will redirect all unauthenticated users to the home page.
Protecting parts of a page
Parts of a page can be hidden for unauthenticated users in the same way:
<?php snippet('header') ?>

<h1><?= $page->title()->html() ?></h1>

<?= $page->text()->kirbytext() ?>

<?php if($site->user()): ?>
Top Secret: the meaning of life is…
<?php endif ?>

<?php snippet('footer') ?>
Protecting content by role
If you have multiple frontend user roles and you want to allow access to certain pages or parts of pages only to particular roles, you can ask for the current user's role like this:
<?php if($user = $site->user() and $user->hasRole('client-a')): ?>
This part of the page is only visible for
clients with the role client-a
<?php endif ?>
Displaying user information
The $user object can be used to display all the entered user information very easily. A good example for this would be a small user card in the header of the site to display the currently logged in user:
<header>
  <h1><a href="<?= url() ?>">Your Logo</a></h1>

  <?php snippet('menu') ?>

  <?php if($user = $site->user()): ?>
  <div class="user">
    <figure class="user-avatar">
      <?php if($avatar = $user->avatar()): ?>
      <img src="<?= $avatar->url() ?>">
      <?php else: ?>
      <img src="<?= url('assets/images/avatar.png') ?>">
      <?php endif ?>
    </figure>
    <div class="user-name">
      <?= esc($user->firstName() . ' ' . $user->lastName()) ?>
    </div>
  </div>
  <?php endif ?>
</header>