Working with Git
Git is currently the most popular version control system for any kind of software project. A version control system is a bit like a time machine for your code, which makes it possible to follow all the changes you've made, work together on the same code in a team and revert mistakes during the development process.
Kirby 2 is separated into three Git repositories, which are all hosted on Github. This separation makes it easy to add those repositories to your own Git controlled projects in a second with Git submodules.
Kirby's repositories
1. Kirby
The Kirby core repository is the heart and soul of Kirby. You could run a website with just this core in combination with a content and a site folder. The Panel is actually optional if you don't need the web interface.
https://github.com/getkirby/kirby
2. Toolkit
The Kirby toolkit is Kirby's foundation. It's an open-source PHP library which helps to provide a smooth layer for all the tasks that are not so easy or not so convenient with PHP's native functions and classes. The toolkit is a submodule of the Kirby core repository, so it will be automatically included when you add the core.
https://github.com/getkirby/toolkit
3. Panel
The Kirby Panel is Kirby's web interface, which makes it easier for clients to create and edit content.
https://github.com/getkirby/panel
Starting a new project
The easiest way to install Kirby is the Starterkit. It can be installed with a single line in the terminal. Navigate to the place where you want to install Kirby and clone the Starterkit code with…
git clone https://github.com/getkirby/starterkit.git your-projectNavigate to the project folder:
cd your-projectRunning the starterkit
If you've got PHP 5.4 or newer running on your machine, you can start a test server for the starterkit with…
php -S localhost:8000Just open http://localhost:8000 in your browser to see the starterkit in full glory.
Create your own repository
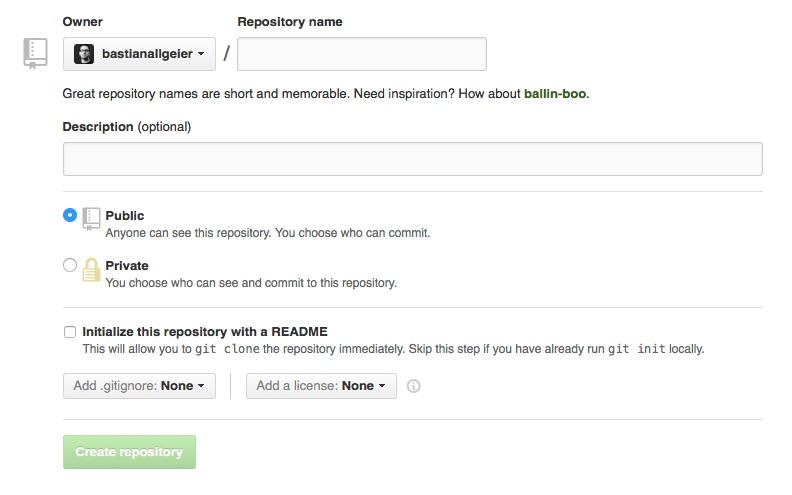
To decouple the Starterkit from the original repository on Github, you should create your own repository on Github, Bitbucket, Gitlab or a similar Git hosting platform. For this tutorial we are going to create a Github repository.
Sign up for a Github account if you don't have one already and look for the "New Repository" button.
Enter a name for your new repository and add it.
Once your new repository has been created, copy the Repository-URL (it doesn't matter if you use the HTTP or SSH version)
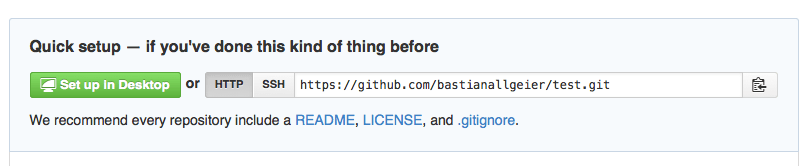
We will now link the cloned Starterkit with your own repo and push the current version (please make sure to replace my fake URL with your own repository URL):
git remote set-url origin https://github.com/your/repo.git
git push -u origin master
Whenever you are going to push changes now, they are going to your own Github repository.
Making changes to your repository
In most cases the workflow when making changes is very simple:
Stage current changes for the next commit:
git add -ACreate a commit:
git commit -am "Changed the menu snippet"Push a commit to Github
git pushThis is not meant to be a full-featured Git introduction. Please check out the wonderful Beginner Guide by the guys from the Tower Git client for more help: http://www.git-tower.com/learn/
We can also highly recommend Tower if you are on the Mac and you are afraid of the Terminal or like to have a more visual approach to Git.
Updating Kirby
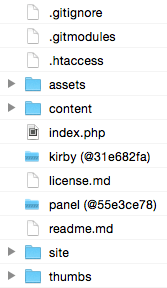
If you want to update the Kirby core and the Panel, all you need to do is add those folders as Git submodules once like this:
// change into your project folder
cd your-project

// remove the panel and kirby folders
rm -R panel kirby

// stage the changes
git add .

// add kirby as submodule
git submodule add https://github.com/getkirby/kirby.git

// add panel as submodule
git submodule add https://github.com/getkirby/panel.git

// update all submodules
git submodule update --init --recursive
Now if you want to update to the latest version of the Kirby core and the Panel in the future, all you have to do is checkout the master branch and pull the changes:
git submodule foreach --recursive git checkout master
git submodule foreach --recursive git pull
The first line will make sure that all submodules are on the master branch. All the latest Kirby releases will be on the master branch. With the second line, the latest version of each submodule will be pulled.
Now all you need to do is make sure that the latest versions are being added to your project repository:
git add -A
git commit -am "Kirby Update"
git push
You can add those five lines to a simple bash script to make this step even easier:
#!/bin/bash

git submodule foreach --recursive git checkout master
git submodule foreach --recursive git pull

git add -A
git commit -am "Kirby Update"
git push
Save this with your site and call it update.sh. Make it executable with
chmod +x update.shFrom now on you can update your installation with a single line:
./update.shIf you want to checkout the development branch to test the latest features, you can do it in the same way:
git submodule foreach --recursive git checkout develop
git submodule foreach --recursive git pull
Then stage and commit your changes like above. This way, you can easily switch between the develop and the master branches.
Go beyond
Those first steps with Git are only the beginning. This could easily be extended to a powerful deployment setup, which will automatically send updates to your staging or live server whenever you push to Github with a service like DeployHQ for example or a post commit hook. We will try to cover this in a later tutorial.