Handling images in Kirby

- Restrict image upload in the Panel
- Uploading images
- The file viewer
- Adding meta data to images
- Auto-resize images on upload
- Adding images to pages
- Accessing images in templates
- Using and accessing image meta data
- Resizing and manipulating images
Images are an important part of almost any website, and there are many ways to integrate them into yours: as single inline images or as galleries, as full screen images or preview thumbs. In this recipe, we will cover the most important things you need to know when working with images in the Panel and in your templates.
Restrict image upload in the Panel
By default, image uploads are allowed for each page, unless otherwise defined in your blueprints. We can set limits on image uploads e.g. by number and size like this:
files:
  max: 5
  size: 12000000
For further options see the blueprint file settings documentation.
Image uploads can also be controlled depending on user rule through permissions. For example, to prohibit image upload for the editor role, put the following code into site/roles/editor.php:
<?php

// site/roles/editor.php
return [
  'name'        => 'Editor',
  'default'     => false,
  'permissions' => [
    '*'                 => true,
    'panel.file.upload' => false
  ]
];
There are a lot more options to finetune these permissions down to an individual user. Check out the permission docs for details.
Uploading images
If image uploads are allowed for a page, there will be a files section in the sidebar of the Panel. To upload an image, click on the "Add" button and select an image.
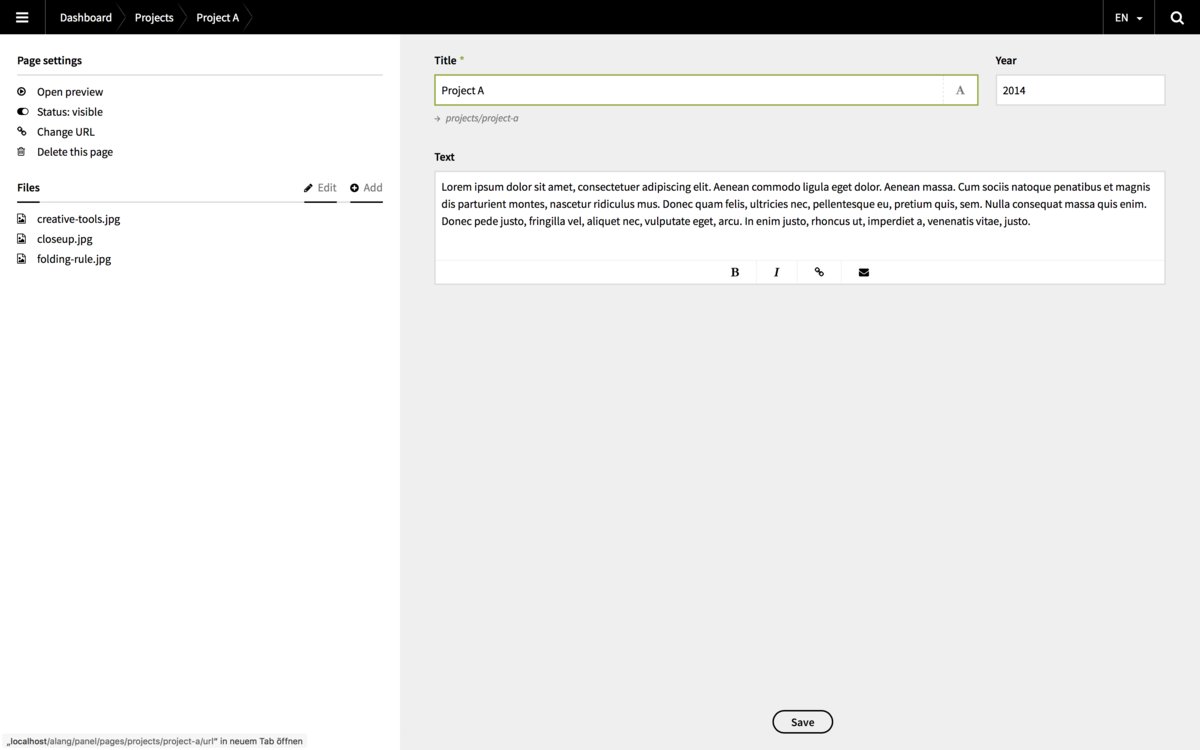
The file viewer
Click on the Files link in the sidebar to access the file viewer.
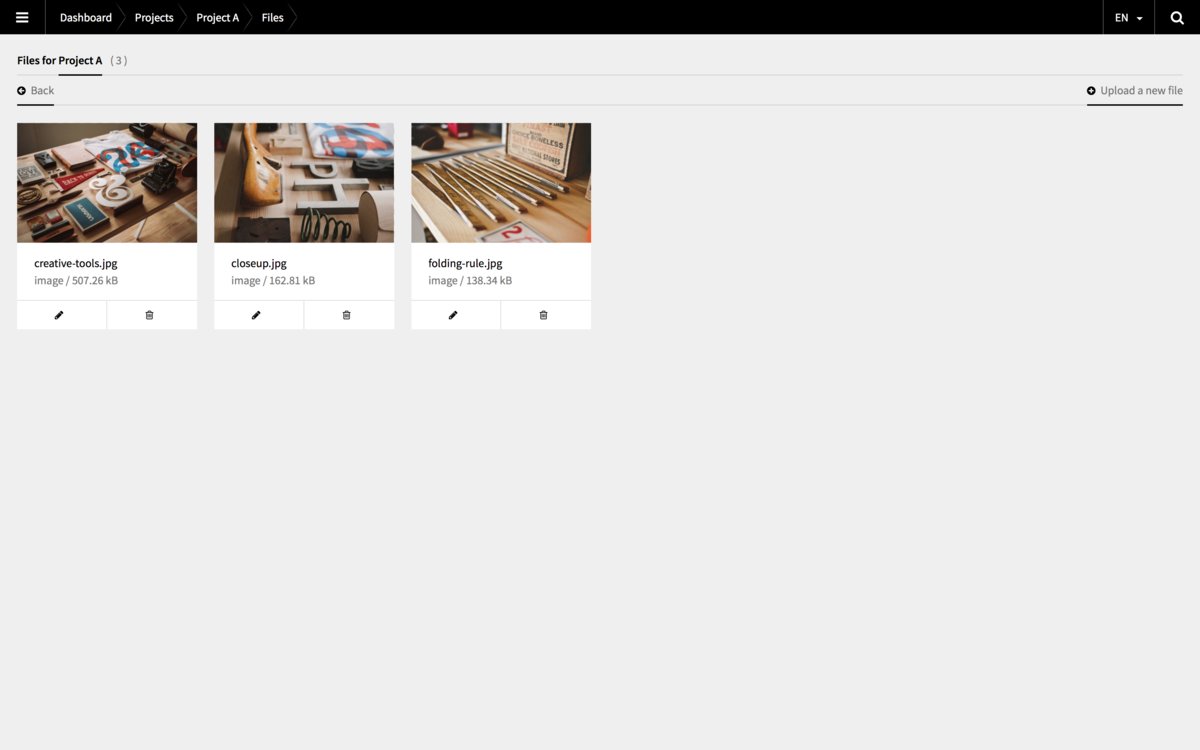
Under each image thumb in the file viewer, there is an edit and a delete button. When we click on the edit button, the single file view is loaded, see below under Adding meta data.
Manual sorting
If manual sorting has been enabled in the page's blueprint, we can manually reorder images in the file viewer by dragging and dropping them in the desired order. When we do so, Kirby creates a meta data file with a sort field. In our templates, we can then sort images by this field in our templates/controllers.
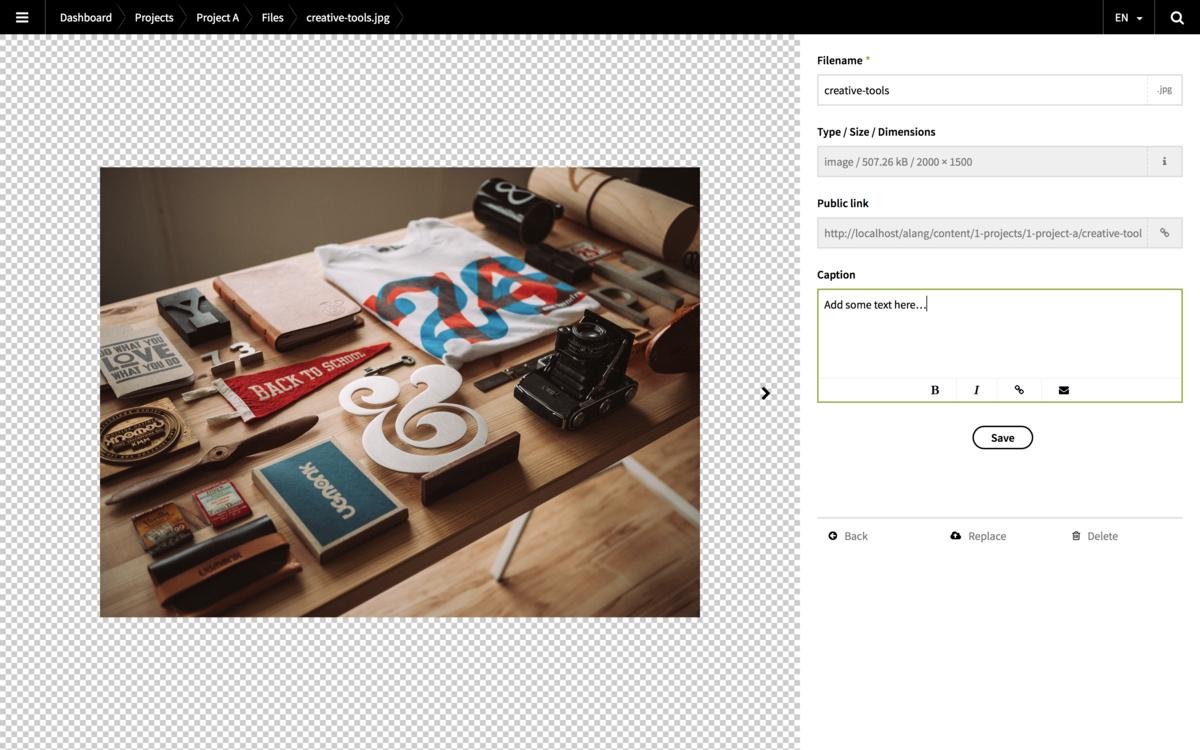
Adding meta data to images
Often, we want to add captions or other information to our images. We can do so via a meta data file. The fields to be used in the meta data file are also defined in the blueprint like this:
…
files:
  fields:
    caption:
      label: Caption
      type: textarea
…
Now if we click on an uploaded image in the Panel, we can add meta data to this file.
Auto-resize images on upload
While it would be ideal if users only uploaded optimized images, we can't really trust on it all the time. And if we don't want to restrict image size on upload, but nevertheless make sure that images do not exeed a certain size, we can use a hook to automatically resize images after they have been uploaded/replaced. Here is an example:
<?php
kirby()->hook('panel.file.upload', 'resizeImage');
kirby()->hook('panel.file.replace', 'resizeImage');

function resizeImage($file) {
  // set a max. dimension
  $maxDimension = 1000;
  try {
    // check file type and dimensions
    if ($file->type() == 'image' and ($file->width() > $maxDimension or $file->height() > $maxDimension)) {

      // get the original file path
      $originalPath = $file->dir() . '/' . $file->filename();
      // create a thumb and get its path
      $resizedImage = $file->resize($maxDimension, $maxDimension);
      $resizedPath = $resizedImage->dir() . '/' . $resizedImage->filename();
      // replace the original image with the resized one
      copy($resizedPath, $originalPath);
      unlink($resizedPath);
      }
  } catch (Exception $e) {
      return response::error($e->getMessage());
  }
}
If you like, you can also use external services to optimize images using hooks.
Adding images to pages
Add images in textarea fields
To place an image into your text fields, drag and drop the image from the sidebar into the textarea. Kirby automatically adds a Kirbytag that looks like this:
(image: example-image.jpg)You can add a couple of options to this image tag, like a class, the width etc. Check out the docs for more details.
Selecting single images
To let users select a single image from the current page, your best bet is the image field. It allows dragging and dropping an image from the sidebar or selecting it from a list of images in the current page.
 fields:
   cover_image:
     label: Cover images
     type: image
Selecting multiple images
Kirby does not have a native multi-select field, so if we want to select multiple images without a plugin, we can use a structure field:
fields:
  gallery:
    label: Gallery
    type: structure
    fields:
      gallery_image:
        label: Image
        type: image
This way, we can add as many images as we like. To add information for each image, we can add additional fields to the structure. For multiple galleries, we can use multiple structure fields.
A more visual alternative to using a structure field is Tim Oetting's Gallery Field.
Selecting images from other pages
If we want to use images from other pages, we can use a select field with the query option:
fields:
  cover_image:
    label: Cover images
    type: select
    options: query
    query:
      page: somepage
      fetch: images
      value: '{{filename}}'
      text: '{{filename}}'
For multiple images, we can use this type of select field within a structure field as explained above.
Accessing images in templates
Depending on how we add images to our content, there are different ways to fetch them in our templates.
Accessing images in the page folder
To access images in the page folder, we can use the image() and images() page methods. The image() method fetches a single file, while we use the images() methods to access multiple files.
Example: Accessing a single file:
<?php
// get the first image in the folder
$image = $page->image();

//get a single image by name
$image = $page->image('closeup.jpg');
?>

<?php
// always check if the image exists!
if($image): ?>
  <img src="<?= $image->url() ?>" alt="">
<?php endif ?>
Example: Looping through a collection of images
<?php
// get all images in the folder
$images = $page->images();

// get a filtered collection of images starting with "cover-"
$images = $page->images()->filterBy('filename', '*=', 'cover-');

// limit the number of images
$images = $page->images()->limit(6);
?>
<?php

// check if the image collection has any elements
// note that this is not necessary, but we dont want
// an empty div container if there are no images
if($images->count()) ?>
<div class="image-grid">
    <?php foreach($images as $image): ?>
      <img src="<?= $image->url() ?>" alt="">
    <?php endforeach ?>
  </div>
<?php endif ?>
Accessing an image in the content file
When we use the image field, Kirby saves the filename of the image in the content file. We can use the toFile() field method to convert the filename to a file object.
<?php
// suppose the filename is stored in a field called cover_image
$image = $page->cover_image()->toFile();

// always check if the image exists!
if($image):
?>
  <img src="<?= $image->url() ?>" alt="">
<?php endif ?>
Notice that we try to store the image object in the $image variable first and then check if the object exists. This is necessary to avoid errors when we later call the url() (or any other file method) on it. With this check we are on the safe side in case the field is empty, or the image does not exist in the folder.
Accessing an image from another page
If your field contains an image name from another page, you have to use that page in your templates to access the image:
<?php
// let's assume the filename is stored in a field called cover_image
$image = page('path-to-page-with-image')->image($page-cover_image());

// always check if the image exists!
if($image):
?>
  <img src="<?= $image->url() ?>" alt="">
<?php endif ?>
Accessing images stored in a structure field
To access images from a structure field, we can use the toStructure() method.
<?php
$galleryItems = $page->gallery()->toStructure();

foreach($galleryItems as $galleryItem):

  // try to get an image object from the filename
  $image = $galleryItem->cover_image()->toFile();
  // check if the image object exists
  if($image): ?>
    <img src="<?= $image->url() ?>" alt="">
  <?php endif ?>
<?php endforeach ?>
Using and accessing image meta data
Image meta data can be used for sorting or filtering images:
<?php
// use the sort field for sorting images
$images = $page->images()->sortBy('sort', 'asc');

// filter by category field
$images = $page->images()->filterBy('category', '==', 'travel');
?>
The possibilites here are endless.
Of course, you can also just output image meta data (the example assumes there are a "caption" and an "alt" field:
<?php
foreach($page->images() as $image): ?>
  <figure>
    <image src="<?= $image->url() ?>" alt="<?= $image->alt()->html() ?>">
    <?php if($image->caption()->isNotEmpty()): ?>
      <figcaption>
        <?= $image->caption()->kirbytext() ?>
      </figcaption>
    <?php endif ?>
  </figure>
<?php endforeach ?>
Resizing and manipulating images
Kirby's thumb class offers basic methods for resizing and manipulating images. Check out the docs to learn more about how to use and configure thumbsnails:
- v25.getkirby.com/docs/templates/thumbnails
- v25.getkirby.com/docs/developer-guide/configuration/thumbnails